ASTA localization system
From Rsewiki
(Difference between revisions)
(Created page with "Back to ASTA == Description == @todo == How to use == @todo == Calibration == @todo == Installation == @todo") |
|||
| (One intermediate revision by one user not shown) | |||
| Line 2: | Line 2: | ||
== Description == | == Description == | ||
| + | |||
| + | Optitrack | ||
@todo | @todo | ||
| Line 13: | Line 15: | ||
@todo | @todo | ||
| − | == Installation == | + | == Installation (as performed in August 2020) == |
| − | + | === Mount cameras on joints and joints on clamps === | |
| + | |||
| + | Make sure that the camera is not upside-down. | ||
| + | |||
| + | === Prepare 16 safety ropes === | ||
| + | |||
| + | # Cut to the right length | ||
| + | # Use a lighter at both ends | ||
| + | # prepare 8-knots as in rock climbing | ||
| + | |||
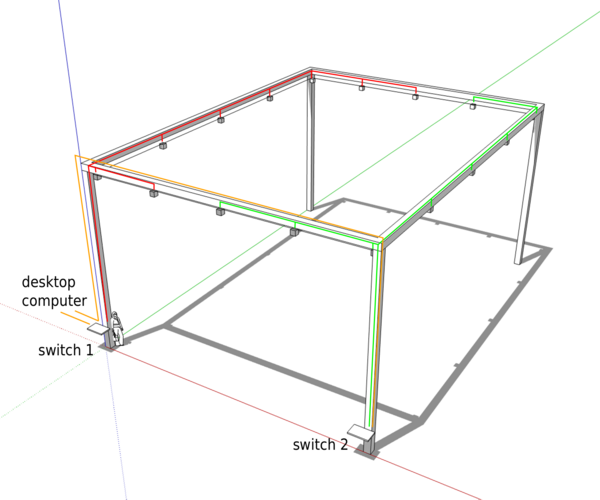
| + | === Mount cameras on truss and wire them with the two switches === | ||
| + | |||
| + | Mount the 16 cameras in the corners and at each 1/4 of the edges. | ||
| + | Use the safety ropes, and wire them to the two switches as below. | ||
| + | |||
| + | [[File:Asta optitrack wiring.png|600px]] | ||
| + | |||
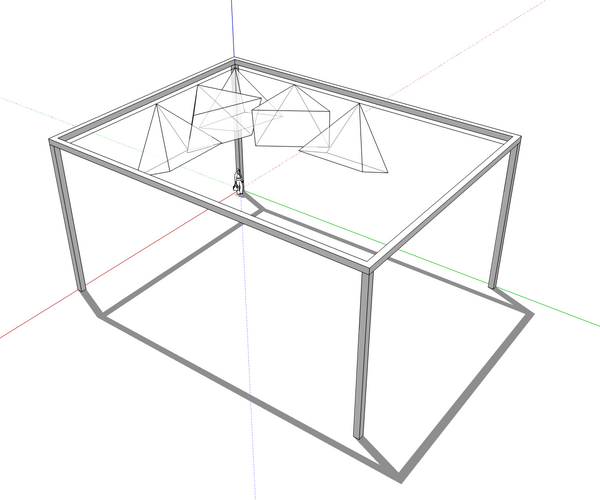
| + | === Orient cameras and adjust focus === | ||
| + | |||
| + | Once the setup is up-and-running, | ||
| + | adjust the focus of each camera using a marker | ||
| + | at 2/3 of the working distance. | ||
| + | Skype and screen sharing may be helpful. | ||
| + | |||
| + | [[File:Asta optitrack.png|600px]] | ||
| + | |||
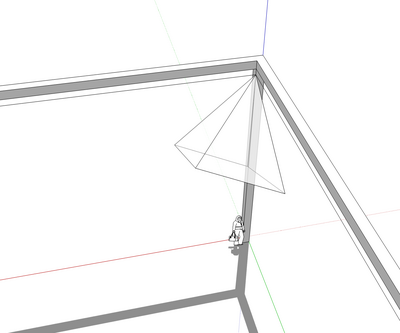
| + | ==== In the corners ==== | ||
| + | |||
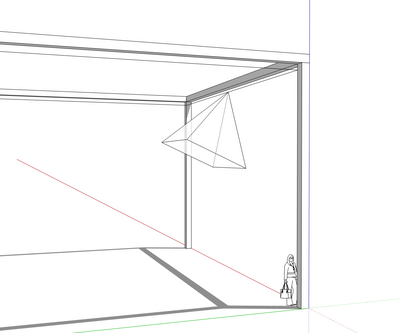
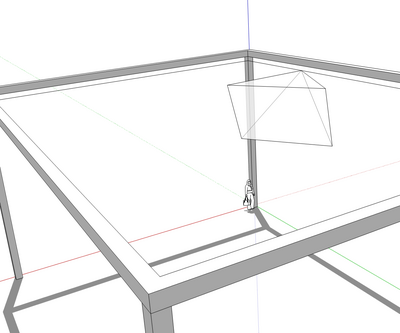
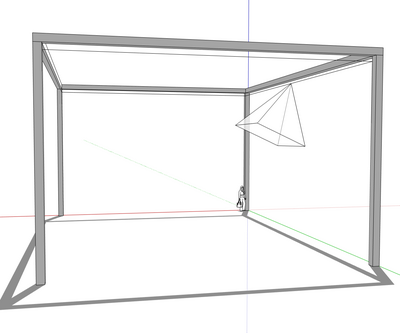
| + | The bottom of FoV is parallel to the long edges, and the bottom right corner is vertical. | ||
| + | |||
| + | [[File:Asta optitrack type1.png|400px]] | ||
| + | |||
| + | ==== At 1/4 of a short edge ==== | ||
| + | |||
| + | The top of the FOV is horizontal, and the camera points toward the center. | ||
| + | |||
| + | [[File:Asta optitrack type2.png|400px]] | ||
| + | |||
| + | ==== At 1/2 of a short edge ==== | ||
| + | |||
| + | The bottom of the FOV is vertical, and the camera aims downward. | ||
| + | |||
| + | [[File:Asta optitrack type3.png|400px]] | ||
| + | |||
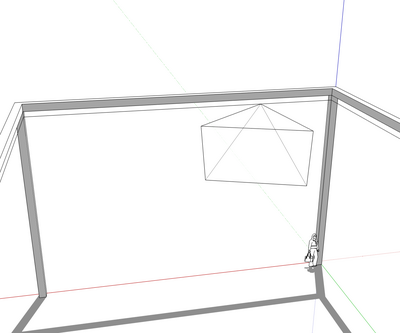
| + | ==== At 1/4 of a long edge ==== | ||
| + | |||
| + | The top of the FOV is horizontal, and the camera points toward the center. | ||
| + | |||
| + | [[File:Asta optitrack type4.png|400px]] | ||
| + | |||
| + | ==== At 1/2 of a long edge ==== | ||
| + | |||
| + | The bottom of the FOV is vertical, and the camera aims downward. | ||
| + | |||
| + | [[File:Asta optitrack type5.png|400px]] | ||
Latest revision as of 15:55, 29 January 2021
Back to ASTA
Contents |
[edit] Description
Optitrack
@todo
[edit] How to use
@todo
[edit] Calibration
@todo
[edit] Installation (as performed in August 2020)
[edit] Mount cameras on joints and joints on clamps
Make sure that the camera is not upside-down.
[edit] Prepare 16 safety ropes
- Cut to the right length
- Use a lighter at both ends
- prepare 8-knots as in rock climbing
[edit] Mount cameras on truss and wire them with the two switches
Mount the 16 cameras in the corners and at each 1/4 of the edges. Use the safety ropes, and wire them to the two switches as below.
[edit] Orient cameras and adjust focus
Once the setup is up-and-running, adjust the focus of each camera using a marker at 2/3 of the working distance. Skype and screen sharing may be helpful.
[edit] In the corners
The bottom of FoV is parallel to the long edges, and the bottom right corner is vertical.
[edit] At 1/4 of a short edge
The top of the FOV is horizontal, and the camera points toward the center.
[edit] At 1/2 of a short edge
The bottom of the FOV is vertical, and the camera aims downward.
[edit] At 1/4 of a long edge
The top of the FOV is horizontal, and the camera points toward the center.
[edit] At 1/2 of a long edge
The bottom of the FOV is vertical, and the camera aims downward.
