ASTA pool
(→Filer maintenance) |
(→Algae growth prevention) |
||
| (One intermediate revision by one user not shown) | |||
| Line 1: | Line 1: | ||
Back to [[ASTA]] | Back to [[ASTA]] | ||
| + | |||
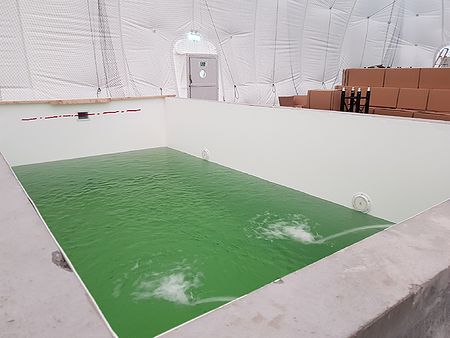
| + | [[file:210539_B330D ASTA vandbassin paafylde_19052020-RS_H2O-lvl.jpg | 450px]] | ||
| + | |||
| + | 6m long, 3.5m wide and 3m deep (when filled) (photo Michael Cole) | ||
| + | |||
| + | The water is all too green (Algaes). | ||
== Algae growth prevention == | == Algae growth prevention == | ||
| Line 5: | Line 11: | ||
If algae is turning the color greenish and form debris of dead algae at the bottom, then it is time to add chloride. | If algae is turning the color greenish and form debris of dead algae at the bottom, then it is time to add chloride. | ||
| − | In the shed in the north-east corner there is pool chloride and a red DTU plastic bottle, fill the bottle 2/3 with chloride powder and poor it into the pool. | + | In the shed in the north-east corner, there is pool chloride and a red DTU plastic bottle, fill the bottle 2/3 with chloride powder and poor it into the pool. |
== Normal cleaning == | == Normal cleaning == | ||
| Line 14: | Line 20: | ||
Objects in the pool can be grapped with the long gripper. | Objects in the pool can be grapped with the long gripper. | ||
| − | |||
| − | |||
| − | |||
| − | |||
| − | |||
| − | |||
| − | |||
| − | |||
| − | |||
| − | |||
| − | |||
| − | |||
| − | |||
== Cover == | == Cover == | ||
Latest revision as of 16:38, 18 June 2021
Back to ASTA
6m long, 3.5m wide and 3m deep (when filled) (photo Michael Cole)
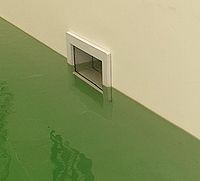
The water is all too green (Algaes).
Contents |
[edit] Algae growth prevention
If algae is turning the color greenish and form debris of dead algae at the bottom, then it is time to add chloride.
In the shed in the north-east corner, there is pool chloride and a red DTU plastic bottle, fill the bottle 2/3 with chloride powder and poor it into the pool.
[edit] Normal cleaning
- Dump the cleaning robot into the pool, let it sink to the bottom, turn it on on its control box. Allow it to drive around for 2-3 hours.
- Pull it to the surface in the cable,and then use both hands to bull it out of the water - draining it for internal water.
- Clean the filter - there is a bucket with water somewhere.
Objects in the pool can be grapped with the long gripper.
[edit] Cover
Unroll after use to keep evaporation low.
[edit] Water flow control
Use the remote control in the main shed (picture to arrive soon)
[edit] Filer maintenance
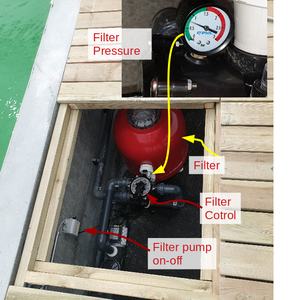
Access the filter system by opening the hatch.
The filter needs to be cleaned about every month. When the pressure approaches the red area it is time to clean.
1. Start by turning off the filter pump.
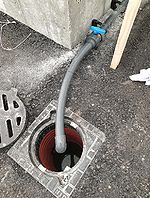
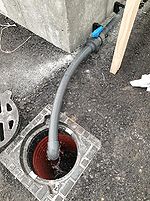
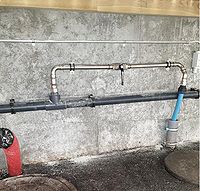
2. Mount the excess pipe.
2.1 The drain don't needs to be opened. Pull the cover off (2 hands, and mind your bag), or leave it on.
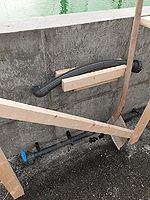
2.2 Take the drain pipe and mount it.
2.3 Open the blue valve.
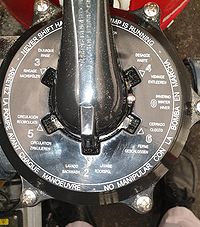
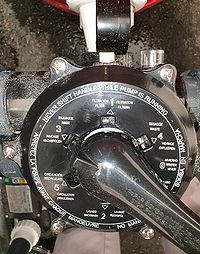
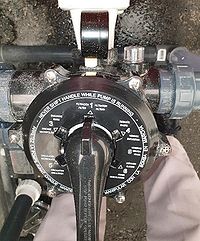
3. Switch the filter to position 2 - backwash. It will reverse the flow in the filter and dump the debris into the drain-pipe.
Turn on the pump and let it stay in that position for 1-2 minutes.
4. Turn off the pump and switch to position 3 - rinse. It will use the normal flow in the filter but dump any debris in the other end of the filter to the drain.
Turn on the pump for 10-20 seconds.
5. Turn off the pump and switch the filter back to normal - position 1 - filter.
6. Top up the water level by opening the water tab valve until the water is in the middle of the pool outlet.
7. Disconnect the drain-pipe and close the drain cover.
