User interface
| Line 61: | Line 61: | ||
Figure 6. Other tab pages are available from the "show" menu. | Figure 6. Other tab pages are available from the "show" menu. | ||
| − | ==Mission== | + | ===Mission=== |
Missions are entered through the mission tab: | Missions are entered through the mission tab: | ||
| Line 78: | Line 78: | ||
The mission is lost for the robot after a power cycle, unless you save the configuration to robot flash - using the "save to robot flash" to in the left pane. | The mission is lost for the robot after a power cycle, unless you save the configuration to robot flash - using the "save to robot flash" to in the left pane. | ||
| − | === Mission lines === | + | ==== Mission lines ==== |
Mission specification consist of mission lines, each line consist of two (lower case) parts divided by ':' | Mission specification consist of mission lines, each line consist of two (lower case) parts divided by ':' | ||
Revision as of 13:31, 28 January 2017
Contents |
Screen dumps
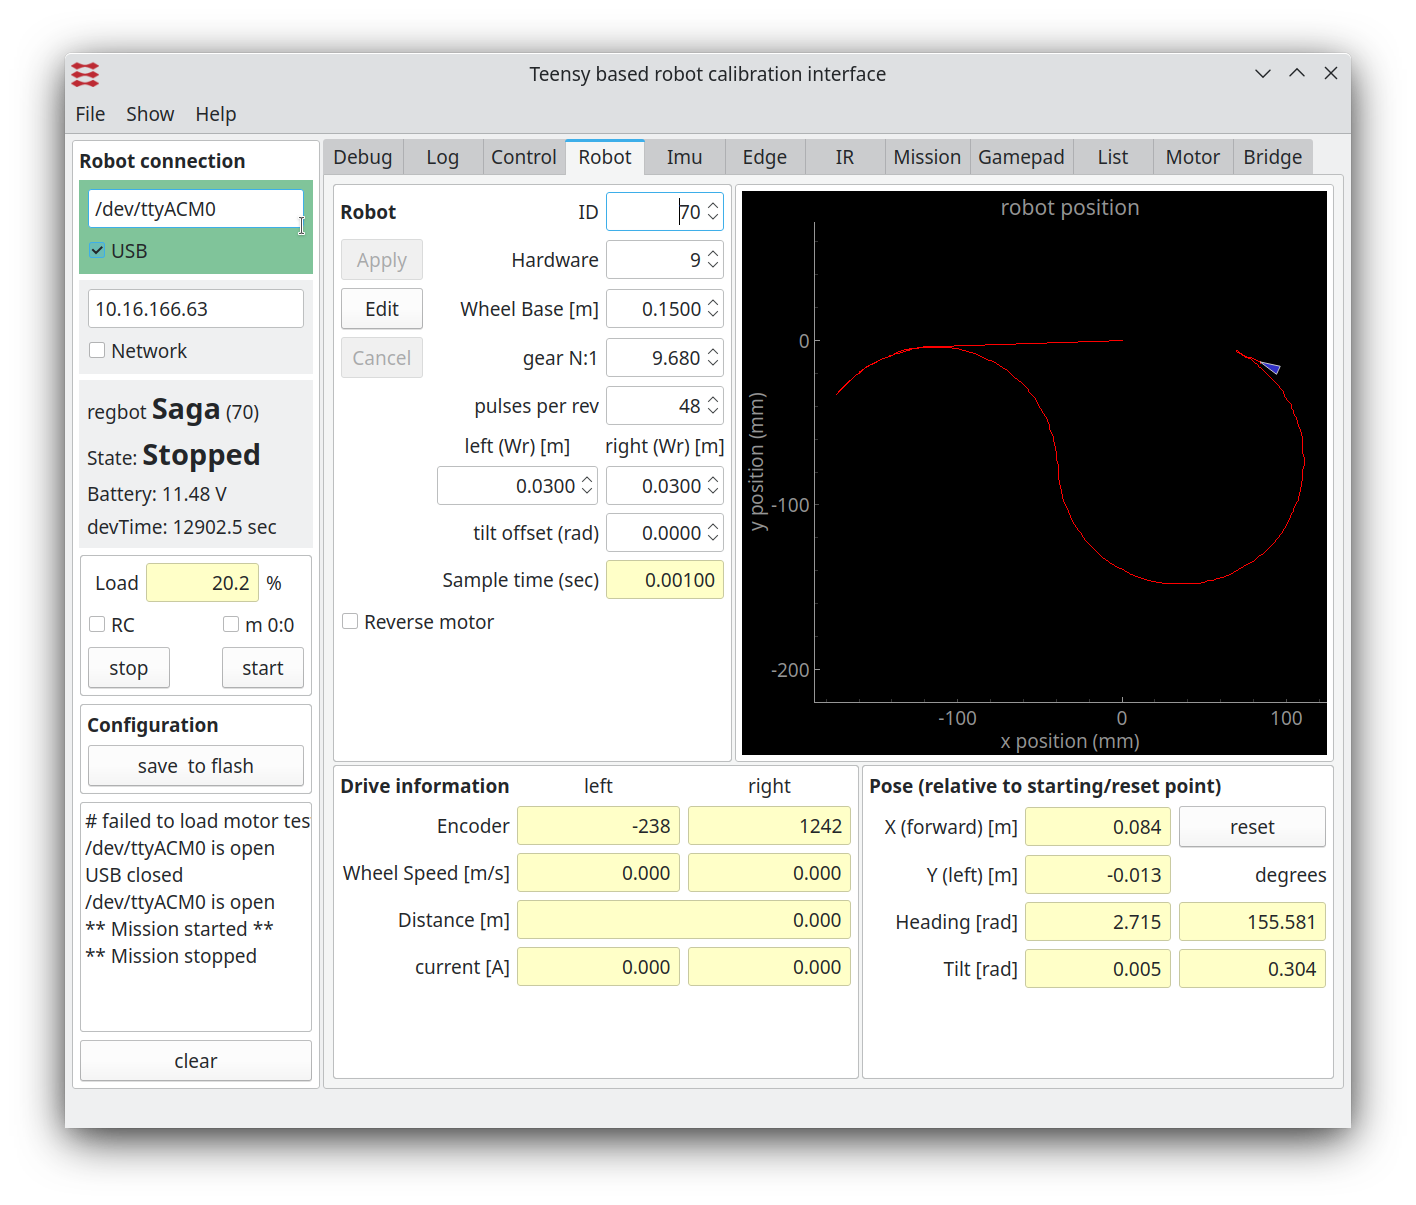
The user interface can configure and run the robot, as well as inspecting almost all values on the robot. Written in python using Qt GUI library.
The interface looks like on figures below.
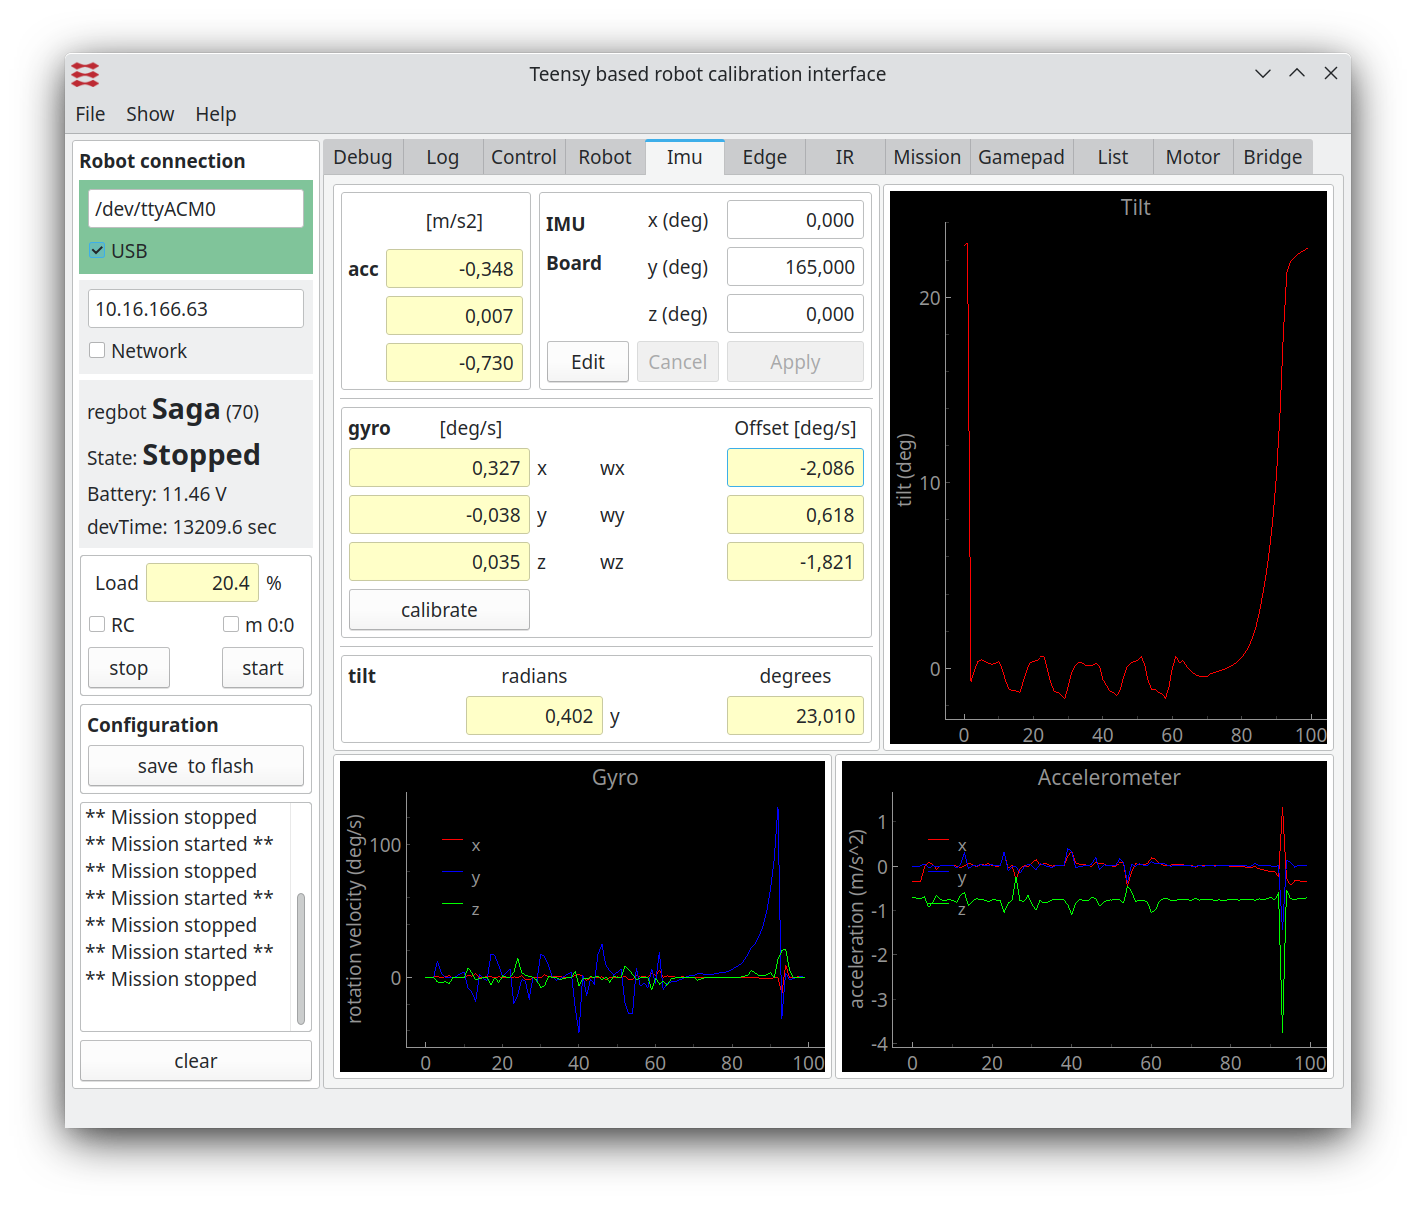
Figure 1. The general settings for the robot. The left panel is the general connection status and space for some messages from the robot. The central tab is mostly for configuration of the robot and some sensor and calculated values like pose and tilt. To the right is a fast graph of the last mission.
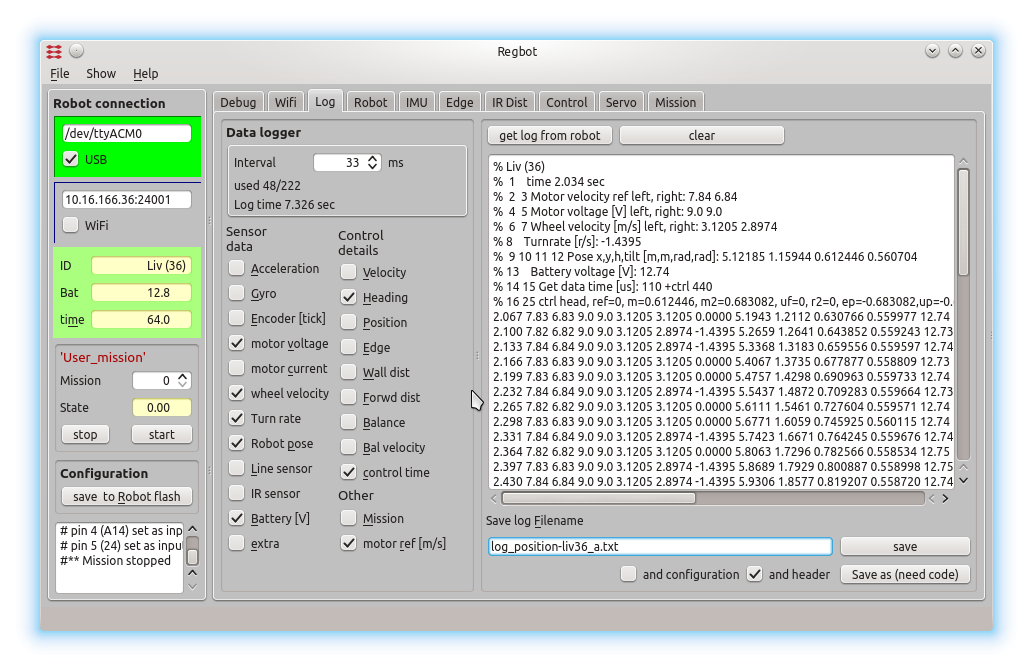
Data logger
Figure 2. The data logging options. A number of sensor values and interface points in the robot software can be logged. The text window shows loaded data from a mission. The log format is designed to be directly compatible with the 'load' function in MATLAB.
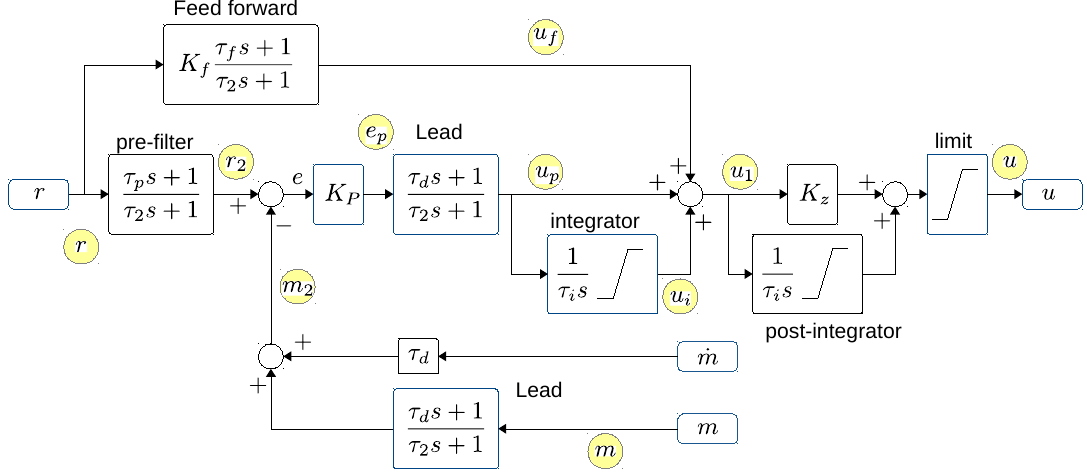
The control details gives detaild at datapoints connected to or inside the general PID controler design used for all control settings. These control datapoints is illustrated in the figure below.
Controller block overview
Figure 3. The general PID controller design with additional optional controller parts. "r" is reference input. And after the optional "pre-filter" the reference is compared with the measured value "m", optionally through a Lead filter. The "m-dot" is an optionally derivative of the measurement, that can be used for a less noisy Lead (with tau_d as normal, but no pole). The error signal "e" is fed through a gain "Kp", an optional Lead and an optional integrator. After this the output "u1" is summed from "up" (proportional/Lead), "ui" integrator term and "uf" from an optional feed forward branch. The output "u1" can further optionally be integrated (if Kz=0, if Kz=1 then the post-integrator has a zero). The output is finally limited to signal "u".
The yellow circles indicate the datapoints that can be logged.
All integrators can be limited. The integrators are further disabled if the output limiter limits the output. Some of the control interfaces (all but the balance controllers) further disables integrators when there is defined an acceleration limit in the mission, and this actually is limiting the acceleration.
The "post-integrator" is usable in the balance controller, as is the "m-dot" that is connected to tilt velocity from the gyro.
Controller configuration
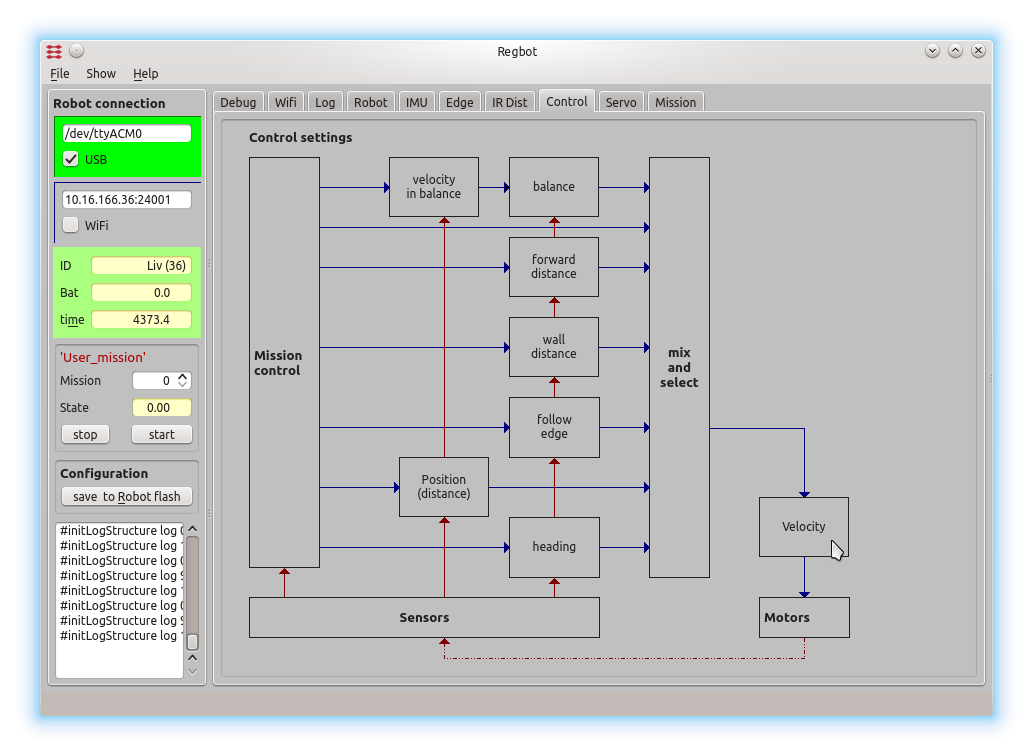
All controllers can be configured from the "control" page. See Design_overview for more control details.
Figure 4. All control values are set from this page, click on the relevant controller and enter the relevant values in the dialogue window shown below.
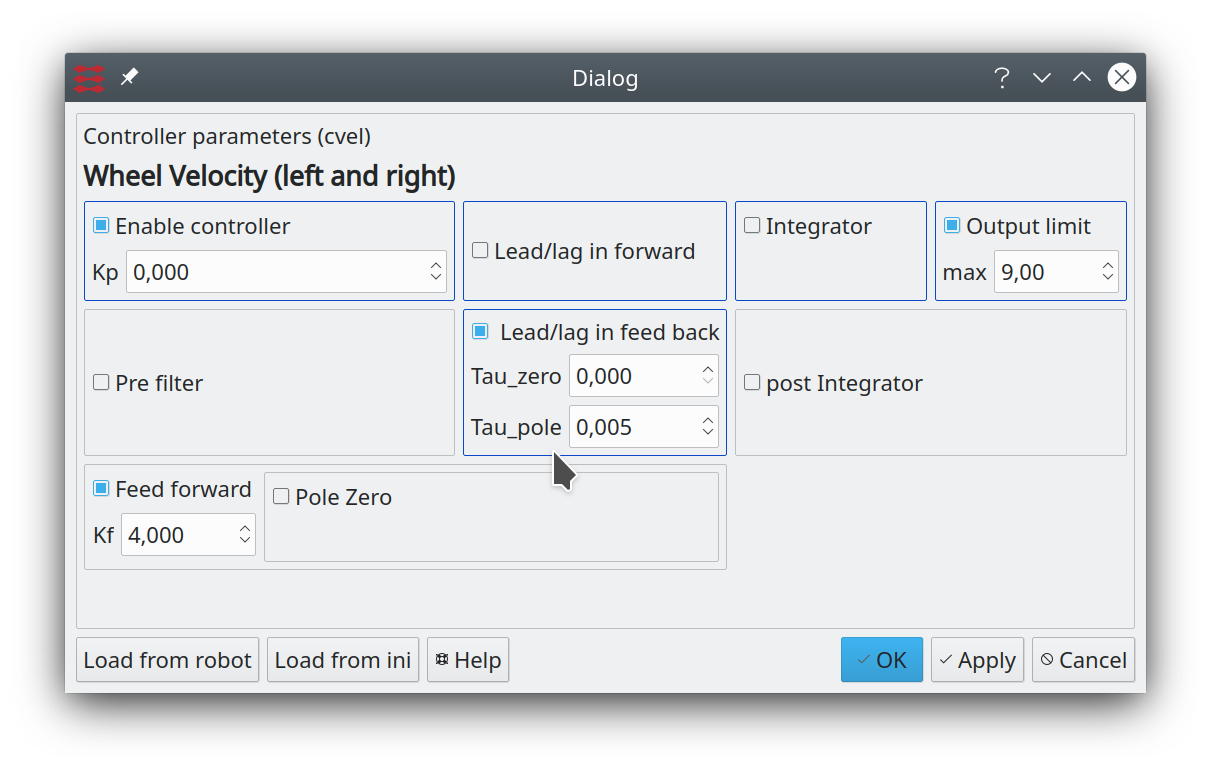
Figure 5. This dialogue configures the wheel velocity controller - shown as a PI-controller with output limit at (+/-) 9V and an integrator limit of (+/-) 4V. All other options are disabled.
IMU
The IMU page shows data from the IMU, and is used for tilt measurement for the balance controller only.
Figure 5.1 IMU data. The graph shows calibrated values, and the gyro is calibrated by keeping the robot satble and press the "calibrate" button. (remember to save the result in robot flash). The servos drift slightly, so repeat if needed.
Menu
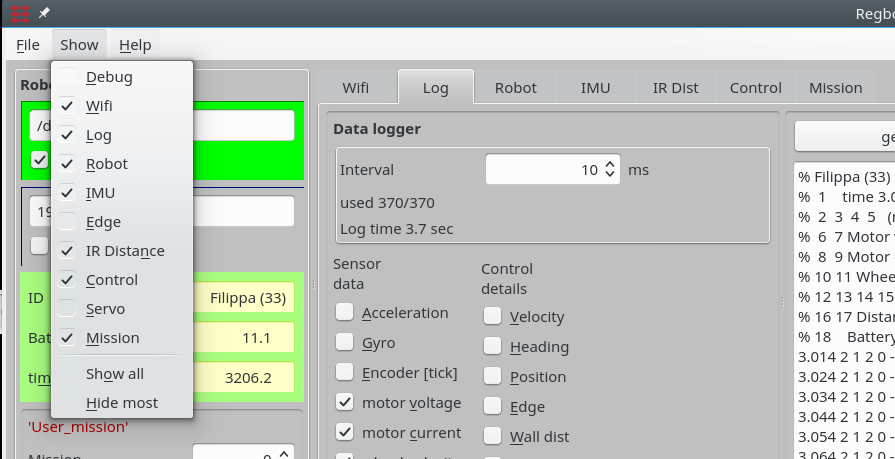
Figure 6. Other tab pages are available from the "show" menu.
Mission
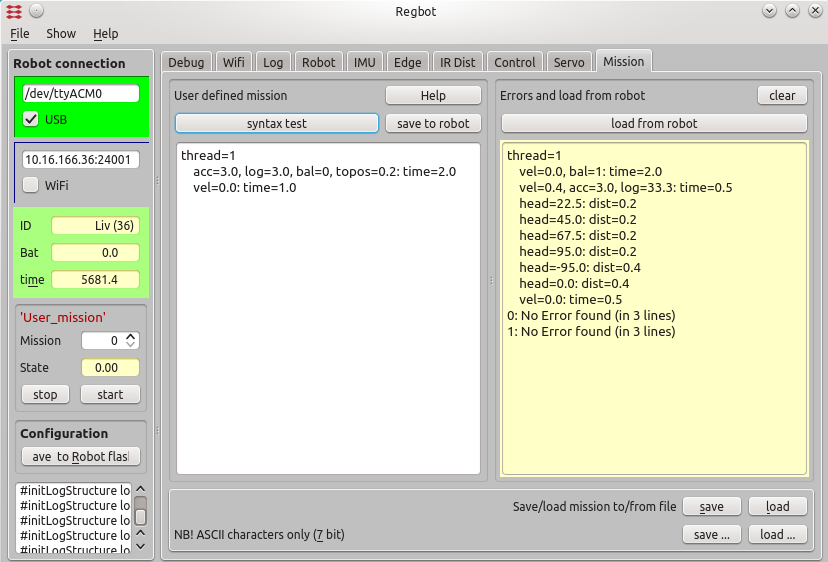
Missions are entered through the mission tab:
Figure 7. Missions atr entered in the left (white) area, and can be syntax tested with the button above. The result of the check is shown in the yellow area (right). The mission actually on the robot can be fetched to the right area. Missions (the left area) can me saved and loaded from text files with the buttons below.
If you copy-paste from another application, so make sure not to include any formatting, 7-bit ASCII characters are allowed only.
Missions are not saved to the robot before you press "save to robot".
The mission is lost for the robot after a power cycle, unless you save the configuration to robot flash - using the "save to robot flash" to in the left pane.
Mission lines
Mission specification consist of mission lines, each line consist of two (lower case) parts divided by ':'
drive parameter: continue condition (conditions are OR'ed)
e.g.:
vel=-0.2, acc=3.0 : dist=1, time=12
Drive backwards at a speed of 0.2m/s, accelerate with 3m/s2 for 1 meter (or max 12 seconds)
See Mission for more details.
