Python interface
(→Qt GUI interface design) |
(→Qt GUI interface design) |
||
| Line 34: | Line 34: | ||
By running the python class script, the first function that is run is "__init__". In "__init__" usually we define all other python classes that need to be initialized and defined. | By running the python class script, the first function that is run is "__init__". In "__init__" usually we define all other python classes that need to be initialized and defined. | ||
| − | The following code is | + | The following code is a template example of how to connect the user-interface object with the function in your program. The specific object-related function (clicked, released, pressed) varies from object to object. |
# self."user-interface-file"."object-name"."function".connect(self."function name") | # self."user-interface-file"."object-name"."function".connect(self."function name") | ||
| Line 40: | Line 40: | ||
[[File:code1.JPG | 600px]] | [[File:code1.JPG | 600px]] | ||
| + | |||
| + | == Programming GUI == | ||
| + | |||
| + | As the whole Regbot firmware and bridge software is already programmed (see section "Navigation box software" on the main robobot page). And accessing the local@IP port 24001 we are able to receive and send byte-type messages to the network socket. | ||
Revision as of 19:25, 29 November 2020
Qt GUI interface design
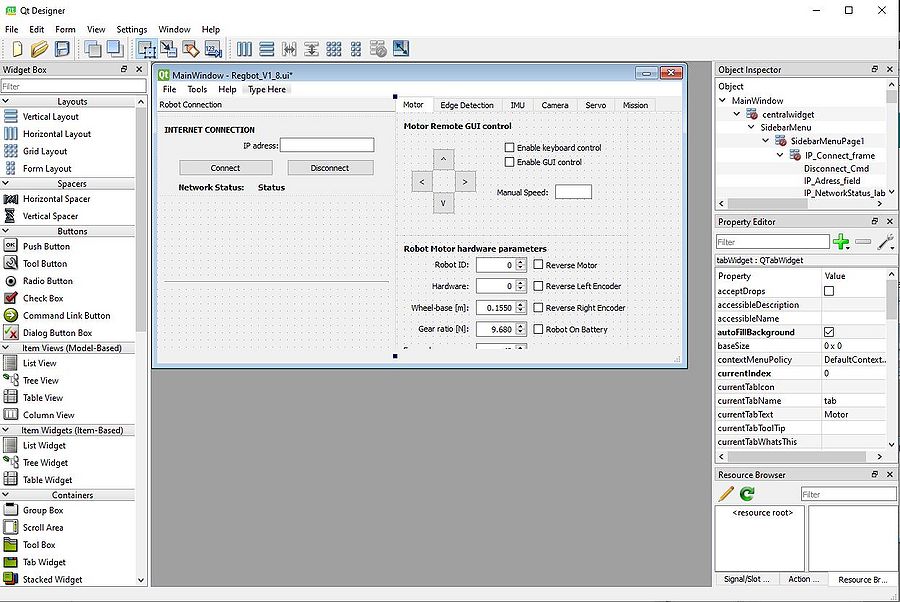
The Regbot desktop application is designed using the Qt-Designer app which uses the widgets from the Qt GUI framework. The application gives a possibility to quickly build interfaces using the drag-and-drop feature for placing necessary components in your interface. The Qt designer produces .ui files that can be translated to C++ or Python interface code. This user interface was designed using Python 3.7.9 and Qt version 5. To some extent, it was possible to use Visual Studio, but I ran into some problems with finding the necessary libraries for some tasks I wanted to use (like cv2, keyboard and some PyQT libraries). A Safe choice was to use one Python development platform on your PC, for example, Spyder (as it was necessary to use this for other courses).
The translated UI file will be autogenerated with all the parameters that were set in Qt-Designer app like - object name, size, and many other parameters that correspond to each specific object. At first, to use Qt-Designer version 5 with python it is necessary to install the necessary python packages:
# Installing PyQt5 package
pip install pyqt5-tools
pip install pyqt5
After installing and designing your user-interface it is necessary to convert your user interface .ui file to a .py file, that can be run in your program. The translated .ui files can be auto-generated using the following commands:
# Generating Python interface file from Qt-Designer .ui file
pyuic5 -x "filename".ui -o "filename".py
Note that this file is generated in the directory where the terminal was opened, so make sure that you know where this file is located after using this command.
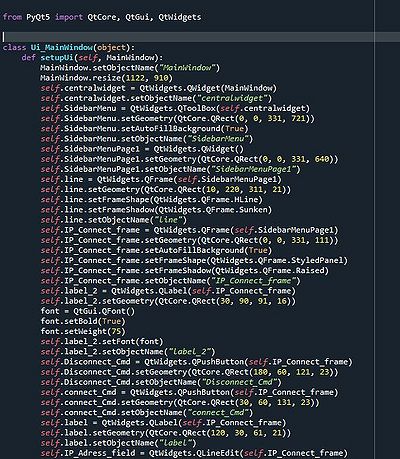
In the picture below, you can see an example of an auto-generated python interface file, that can later be included in the rest of your application as a user interface. By knowing the name of the object, the actual user interface now can also be tweaked by editing the Python code.
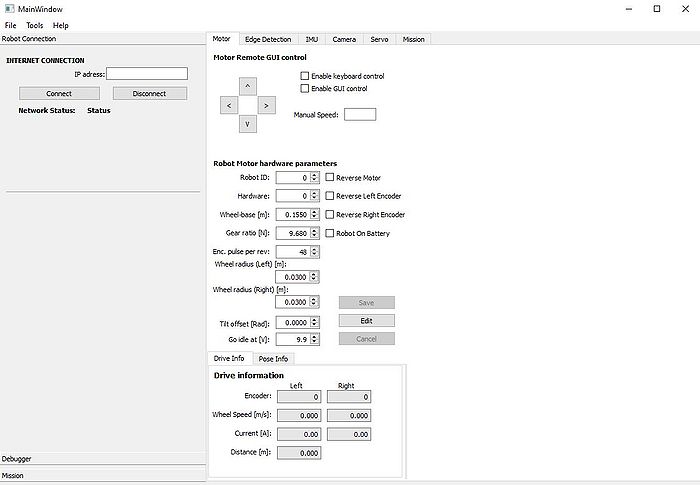
If this auto-generated python file is run on its own, the user interface is executed as an output of this program.
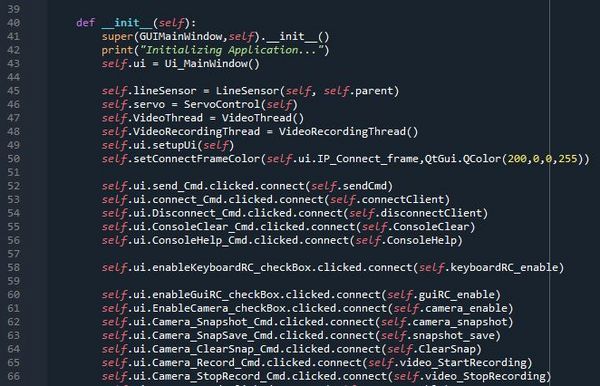
To add functionality to the object of the user interface (like buttons, checkboxes, text fields, etc.), we can attach a function to the interface object to be executed, for example, if the check box is checked, or button is pressed. This can be done by taking the user interface object in the python .py file and passing your function to it as an argument.
By running the python class script, the first function that is run is "__init__". In "__init__" usually we define all other python classes that need to be initialized and defined. The following code is a template example of how to connect the user-interface object with the function in your program. The specific object-related function (clicked, released, pressed) varies from object to object.
# self."user-interface-file"."object-name"."function".connect(self."function name")
See the example below:
Programming GUI
As the whole Regbot firmware and bridge software is already programmed (see section "Navigation box software" on the main robobot page). And accessing the local@IP port 24001 we are able to receive and send byte-type messages to the network socket.


