Regbot
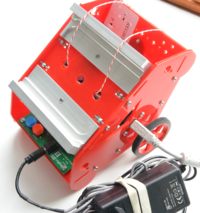
REGBOT is a small robot designed for exercises for our linear control course (PID control) (author).
Contents |
Hardware
Design overview can be found here.
REGBOT comes in 2 versions:
- version 1A - with robot numbers 1..15
- version 2B - with robot numbers 16..
Video presentation https://www.youtube.com/watch?v=mOz4eNkjTM0
Use software as is
To use regbot two software parts are needed - one for the robot (regbot.hex) and the client (regbot.exe (for windows)).
Client software
Get the client software (regbot.exe) from file sharing on campusnet, place it in a directory, this directory will be default for configuration file and result files from the robot.
A USB driver must be installed to get in contact with the robot - see installation in windows
The driver will (on Windows) create a com-port when connected - most likely com3 or any higher number. When the robot is disconnected by unplugging the cable, then the client probably needs to be restarted if it was connected when the cable was unplugged (no connection detect in windows).
The run the regbot.exe file.
User interface and missions
The user interface can configure and run the robot, as well as inspecting almost all values on the robot. Written in python using Qt GUI library.
From the user interface it is possible to make mission scripts.
The User interface page has details.
Robot software
The robot software is compiled into a regbot.hex file, that is loaded into the robot flash disk using a teensy loader.
The loader is found here https://www.pjrc.com/teensy/loader.html.
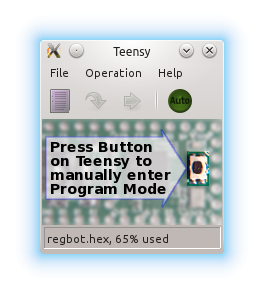
Start the teensy loader - it looks like this
Load the regbot.hex file (found on file sharing for the course) into the teensy loader application.
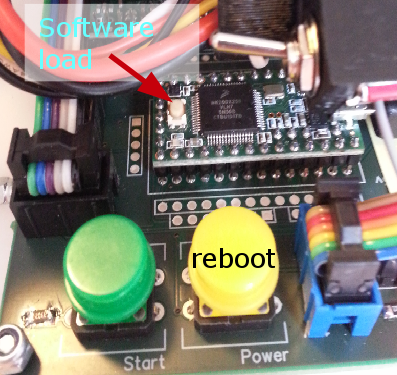
With the robot connected over USB, press the small "software load" button on the teensy board.
NB! It may take up to 30 seconds before the teensy loader detects the board.
Then press "Program" and "Reboot" on the teensy loader application. It may be necessary to press the big "reboot" or "power" button on the robot itself also. On some robots a total power cycle is needed to reboot properly. The robot should blink every 1 second with a short blink.
Software download
The source code for the robot and the client is available here. NB! the software source can not be compiled without the proper tool-chain (compiler and library for the robot and python and libraries for the client)
- Robot software (including regbot.hex): version 2.301 (as of 10 February 2016) - fixed error in disabling faulty velocity estimator.
- Robot software (including regbot.hex): version 2.290 (as of 5 February 2016) - fixed loss of ID if saved mission has more than a few lines.
- Robot software (including regbot.hex): version 2.285 (as of 31 January 2016) - ready for F16 course
- Client software : 2.290 (as of 5 February 2016) - fixed tilt offset error en saved configuration file (regbot.ini)
- Client software (including regbot.exe for windows): 2.285 (as of 31 January 2016) - ready for F16 course
repository for software - client and robot
On a Linux computer do something like this:
svn co svn://repos.gbar.dtu.dk/jcan/regbot/regbot .
svn co svn://repos.gbar.dtu.dk/jcan/regbot/qtgui .
Install software tools
The software tools to modify the software requires some tools.
- Software installation and tool-chain - Linux
- installation in windows and some of the tool-chain
- Schematic
Extensions
Camera based line follower
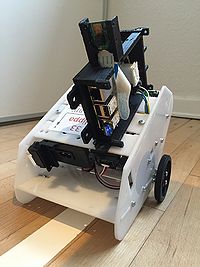
This extension adds a Raspbery Pi with a Raspberry Pi camera on top of the robot. The Raspberry Pi is connected to the robot base through the UART serial connection.
The Camera based line follower detects a tape line in front of the robot and controls the robot to follow the line through the serial connection.
Go to Vision based Line Follower for detailed information on the project and instructions on how to setup a new Line Following RegBot.
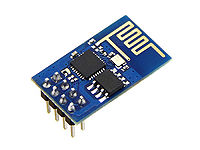
ESP8266
This extension adds wireless communication to the robot through the Teensy's UART serial connection.
Go to ESP8266 for instructions on how to add the ESP8266 to the Teensy board.
