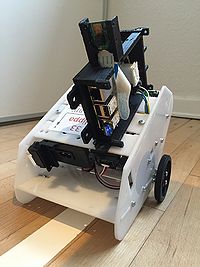
Vision based Line Follower
| Line 31: | Line 31: | ||
Go to the bottom of the file and the information about the WiFi: | Go to the bottom of the file and the information about the WiFi: | ||
| − | + | network={ | |
| + | ssid="Your_SSID" | ||
| + | psk="Your_wifi_password" | ||
| + | } | ||
| − | + | Save the file by pressing '''Ctrl+X''' then '''Y''', then finally press '''Enter'''. | |
| − | + | ||
| − | + | ||
| − | + | ||
| − | + | ||
| + | Restart the Pi by typing <code>sudo reboot</code> and it should automatically connect to WiFi when finished restarting. | ||
| + | ====Setting up SSH==== | ||
Revision as of 18:31, 2 March 2016
Contents |
Hardware needed
For installing and utilizing the line follower application for RegBot robots the following things are needed:
- A fully functional RegBot programmed with latest version of the robot software. Consult this section to ensure that.
- A clean Raspberry Pi (model 2 and above is preferred). In case the Pi is clean with an OS newly installed simply skip the install OS section in Software Installation.
- A Raspberry Pi camera modul.
- A mount for Raspberry Pi + camera module. Consult JCA for this.
- A few female/female jumper wires for connecting the Raspberry Pi with the RegBot.
- A WiFi dongle e.g. EDIMAX EW-7811Un (Raspberry Pi model 3 includes WiFi).
Also it would be good to have access to a "HDMI input"-screen in order to locally make the initial connection to WiFi and setup SSH for remote access.
Software installation
Instructions on how to install the needed software on a Raspberry Pi.
Raspberry Pi
Installing the OS
Use this link to download and install the newest Raspian OS on a SD card. Detailed instructions on how to write an image to a SD card is found within the link as well.
When the OS has been successfully installed insert the SD into the Raspberry Pi - connect a screen via the Pi's HDMI output and a keyboard + mouse set.
Setting up WiFi
Plug in the WiFi dongle and open up a terminal window.
In terminal open the wpa-supplicant configuration file:
sudo nano /etc/wpa_supplicant/wpa_supplicant.conf
Go to the bottom of the file and the information about the WiFi:
network={
    ssid="Your_SSID"
    psk="Your_wifi_password"
}
Save the file by pressing Ctrl+X then Y, then finally press Enter.
Restart the Pi by typing sudo reboot and it should automatically connect to WiFi when finished restarting.
