REGBOT archive
Back to Regbot main page
Contents |
Archive
Design overview can be found here.
Getting started with REGBOT GUI.
User interface, how to configure the robot using the Regbot client.
Control overview gives some information on control possibilities.
Mission, how to write a mission.
Regbot maintenance for longer life.
Regbot calibration for better performance.
REGBOT comes in 3 versions:
- version 2B - with extension boards to match version 3
- version 3 - configuration with (almost) all on one board (REGBOT version 3 technical notes)
- version 4.1- using Teensy 3.5 (Regbot version 4)
Video presentation https://www.youtube.com/watch?v=mOz4eNkjTM0
Intro til HW http://aut.elektro.dtu.dk:rse/regbot/lektion_1_intro_1_hardware_software.mov
REGBOT design sketch https://cad.onshape.com/documents/f14415feea0d8731f084d070/w/e9bf714402f35ee217c58672/e/c64e392bfa5890fe6ebcffad
Robobot
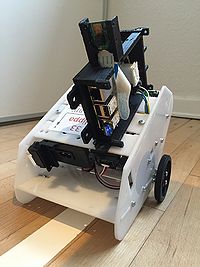
Robobot is a base robot for "Building dependable robot systems". See details here (Robobot), it is basically a Regbot robot extended with a raspberry pi.
Use software as is
To use REGBOT two software parts are needed - one for the robot (regbot.hex) and the client (regbot.exe (for windows)).
Client software
Get the client software (regbot.exe) from file sharing on campusnet, place it in a directory, this directory will be default for configuration file and result files from the robot.
- get software from SVN, or from the link below.
- http://aut.elektro.dtu.dk/regbot/regbot-gui/regbot-gui.exe (might be an old version, see the "about" box)
For windows a complete executable file (regbot.exe) is in the dist subdirectory of QTGUI, or can be downloaded as an exe-file from the link above.
Software download
The source code for the robot and the client is available here. NB! the software source can not be compiled without the proper tool-chain (compiler and library for the robot and python and libraries for the client)
repository for software - client and robot (version 3)
- client: svn://repos.gbar.dtu.dk/jcan/regbot/qtgui
- robot: svn://repos.gbar.dtu.dk/jcan/regbot/regbot
- robobot (c++): svn://repos.gbar.dtu.dk/jcan/regbot/robobot
On windows something like TortoiseSVN needs to be installed, see e.g.: http://www.gbar.dtu.dk/faq/39-svn
On a Linux computer install the subversion package, and do something like this:
svn co svn://repos.gbar.dtu.dk/jcan/regbot/regbot regbot
svn co svn://repos.gbar.dtu.dk/jcan/regbot/qtgui qtgui
svn co svn://repos.gbar.dtu.dk/jcan/regbot/robobot robobot
- Robot software version 3.1046 (march 2019) implemented chirp command
- Robot software version 3.943 (as of 9 Oct 2018) added overload protection (full motor voltage for 0.5sec gives overload).
- Robot software (including regbot.hex): version 2.285 (as of 31 January 2016) - ready for F16 course
- Client software : 3.1046 (March 2019): support for communication through Raspebrry PI bridge.
- Client software : 3.923 (23 Mar 2018) added new chirp command for identification - require big log (teensy 3.5)
- Client software : 3.484 (as of 15 November 2016) - adapted to hardware 3, modular control settings and wifi access
- Client software (including regbot.exe for windows): 2.285 (as of 31 January 2016) - ready for F16 course
Older version
repository for software - client and robot (version 2)
- client: svn://repos.gbar.dtu.dk/jcan/regbot/version2/qtgui
- robot: svn://repos.gbar.dtu.dk/jcan/regbot/version2/regbot
Install software tools
The software tools to modify the software requires some tools.
Linux
Software installation and tool-chain - Linux
Windows
installation in windows with some of the tool-chain
Extensions
Camera based line follower
This extension adds a Raspbery Pi with a Raspberry Pi camera on top of the robot. The Raspberry Pi is connected to the robot base through the UART serial connection.
The Camera based line follower detects a tape line in front of the robot and controls the robot to follow the line through the serial connection.
Go to Vision based Line Follower for detailed information on the project and instructions on how to setup a new Line Following RegBot.
ESP8266
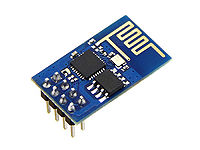
This extension adds wireless communication to the robot through the Teensy's UART serial connection.
Go to ESP8266 for instructions on how to add the ESP8266 to the Teensy board.

